hexo使用Github自动部署
前言
本文章参考

在本文的基础上做了些修改,只限Github,其他的可以继续常考
开始
我们需要的变量名,可以参考糖果屋的文章
| 变量名 | 常亮含义 |
|---|---|
| GITHUBUSERNAME | Github用户名 |
| GITHUBEMAIL | Github邮箱 |
| GITHUBTOKEN | Github申请秘钥 |
| SiteBlogRepo | 存放编译好的博客页面的公有仓库名 |
获取Token
为了确保交由 Github Action来持续部署时,Github Action具备足够的权限来进行 hexo deploy操作,需要先获取 Token,博主分别在 Github处部署了静态页面,所以也就需要获取这一处的 Token。
访问Github->头像(右上角)->Settings->Developer Settings->Personal access tokens->generate new token,创建的Token名称随意,但必须勾选repo项和workflows项。

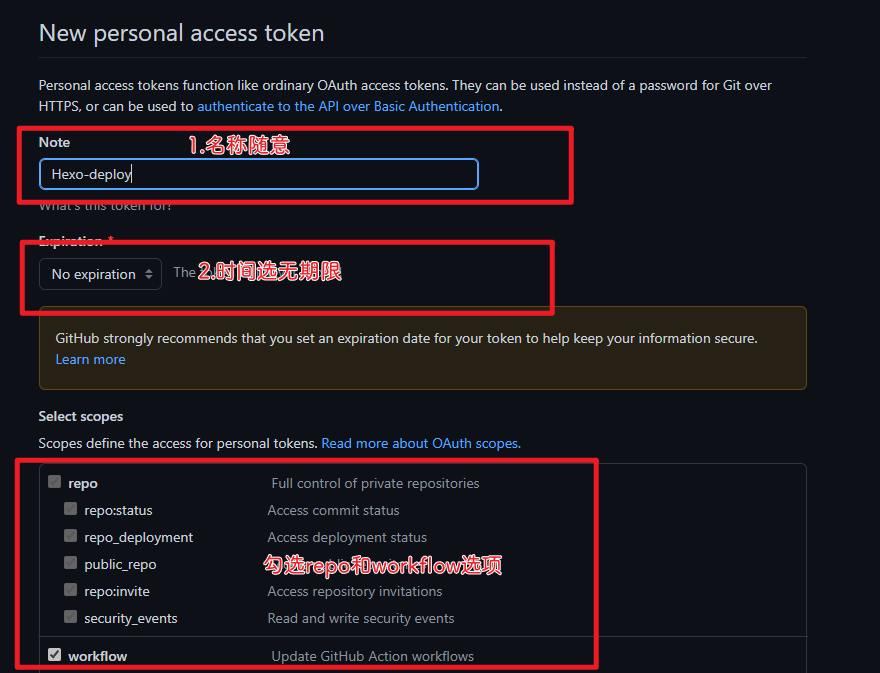

token只会显示这一次,之后将无法查看,所以务必保证你已经记录下了Token。之后如果忘记了就只能重新生成重新配置了。
配置Github Action
- 在
[Blogroot]新建.github文件夹,注意开头是有个.的。然后在.github内新建workflows文件夹,再在workflows文件夹内新建autodeploy.yml,在[Blogroot]/.github/workflows/autodeploy.yml里面输入
1 | # 当有改动推送到master分支时,启动Action |
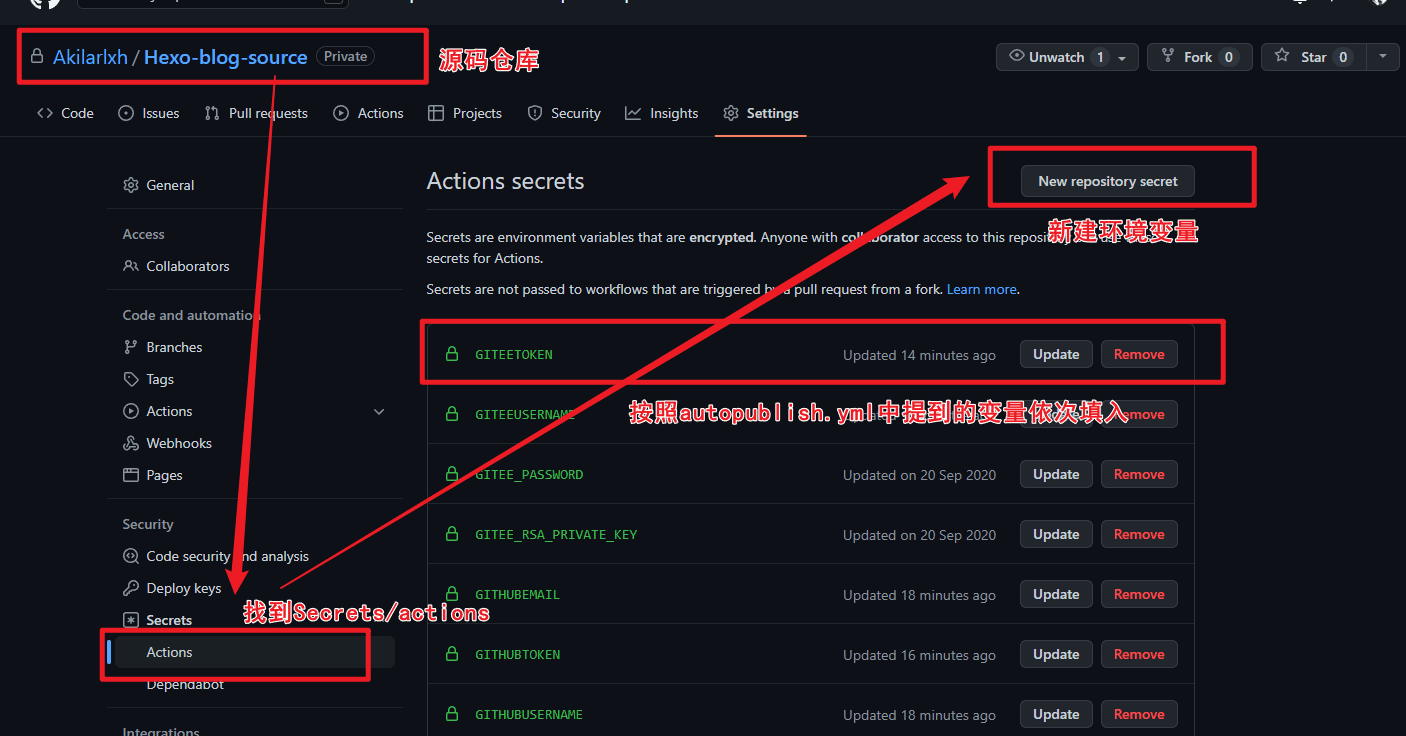
- 之后需要自己到仓库的
Settings->Secrets->actions下添加环境变量,变量名参考脚本中出现的,依次添加。
我偷的图
重新设置远程仓库和分支
- 删除或者先把
[Blogroot]/themes/butterfly/.git移动到非博客文件夹目录下,原因是主题文件夹下的.git文件夹的存在会导致其被识别成子项目,从而无法被上传到源码仓库。 - 在博客根目录
[Blogroot]路径下运行指令
1 | git init #初始化 |
- 添加屏蔽项
因为能够使用指令进行安装的内容不包括在需要提交的源码内,所有我们需要将这些内容添加到屏蔽项,表示不上传到github上。这样可以显著减少需要提交的文件量和加快提交速度。
打开[Blogroot]/.gitignore,输入以下内容:
1 | .DS_Store |
如果不是 butterfly主题,记得替换最后一行内容为你自己当前使用的主题。
- 之后再运行
git提交指令,将博客源码提交到github上。
1 | git add . |
- 此时你的主题文件夹若已经被正常上传,并且你也添加了主题文件夹下的
.git文件夹的屏蔽项。那你可以考虑把第二步移走或删除的.git放回来,用作以后升级。(不禁怀疑真的有人会去用这个方式来升级吗)
查看部署情况
此时,打开 GIthub存放源码的私有仓库,找到 action。 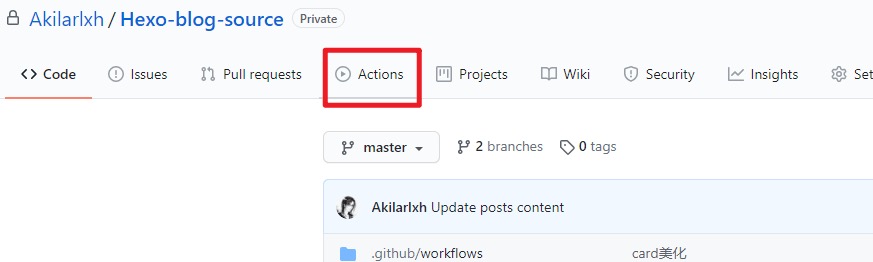
根据刚刚的 Commit记录找到相应的任务
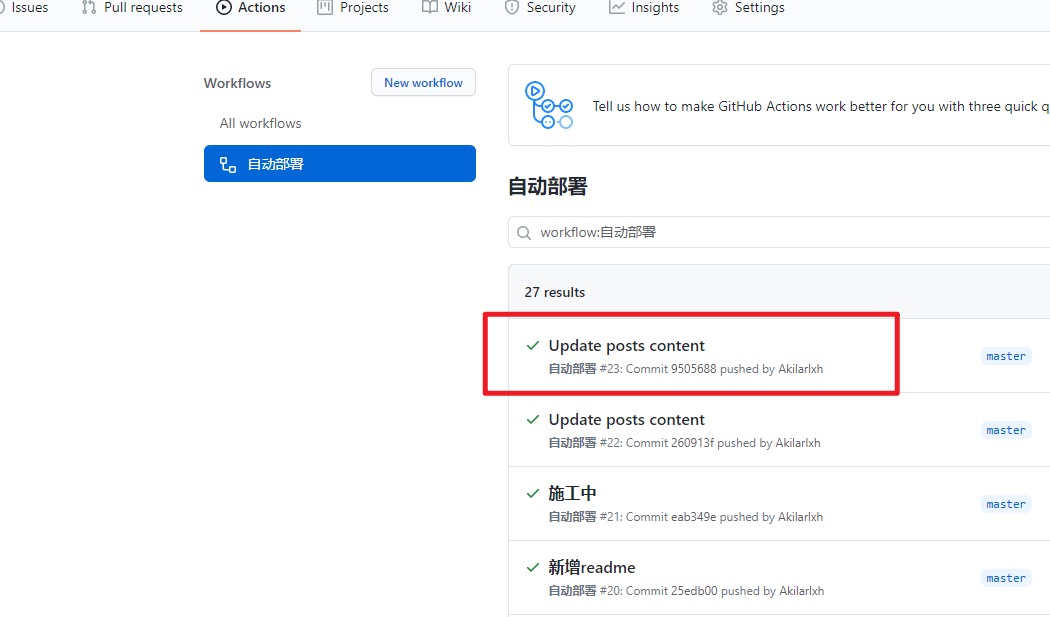 点击
点击 Deploy查看部署情况  若全部打钩,恭喜你,你现在可以享受自动部署的快感了。
一键部署到私有仓库
我们需要安装一个插件hexo-git-backup
1 | npm install hexo-git-backup --save |
之后我们在 [Blogroot]根目录下的 _config.yml中添加以下代码
1 | backup: |
如果是主分支不需要在后面添加分支
如果构建过
.git文件夹需要删除[Blog]根目录下的.git文件夹
在 [Blogroot]根目录下输入以下指令
1 | hexo backup |
之后我们就可以愉快的使用了
评论